How to Make Angel Food Cake: A Heavenly Journey Into the World of Fluffy Goodness
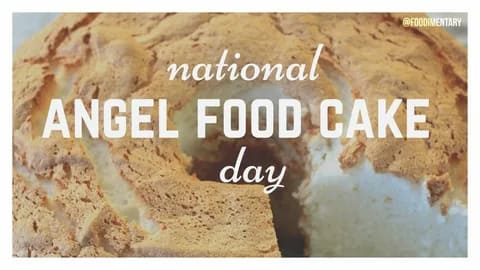
Let’s face it – the world of cakes is a bit complicated. You’ve got chocolate cakes, sponge cakes, fruit cakes, and a whole host of other varieties to choose from. But when you’re craving something light, fluffy, and almost guilt-free, you can’t go wrong with the glorious Angel Food Cake. This cake is a true cloud on earth – delicate, airy, and just as sweet as it sounds.
Now, I know what you might be thinking: “Angel Food Cake? Is that even real food?” Well, the answer is yes! This cake is as real as it gets, and it’s like biting into a little piece of heaven. And while it may seem like a fancy dessert, making it at home is surprisingly easy (and much less intimidating than it looks). So, grab your apron and let’s dive into the delightful world of Angel Food Cake!
What is Angel Food Cake?
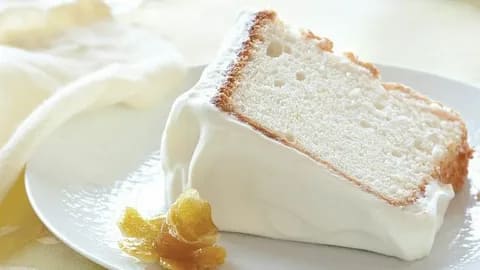
Before we get into the nitty-gritty of how to make this ethereal dessert, let’s talk about what makes Angel Food Cake so special. Unlike your regular cakes, Angel Food Cake is made almost entirely from egg whites. There’s no butter, no fat, and it’s surprisingly low in calories, so you can eat it without the heavy feeling of guilt (unless, of course, you eat half of it in one sitting – don’t judge, we’ve all been there).
The beauty of Angel Food Cake lies in its light, spongy texture, which is achieved through whipping the egg whites until they form stiff peaks. This creates air pockets in the batter, resulting in a fluffy and melt-in-your-mouth cake. Imagine biting into a cloud. That’s Angel Food Cake in a nutshell. But let’s not get too carried away, let’s focus on actually making the thing!
Ingredients You’ll Need for Angel Food Cake:
Before you start questioning whether you need a special angelic talent to make this cake, let me assure you: you don’t. Here’s what you’ll need, and most of it is probably already sitting in your pantry:
- 1 cup of plain flour (not self-raising, we’re not trying to start a rebellion here)
- 1 and 1/2 cups of caster sugar (be sure to use caster sugar; granulated is too chunky for this delicate dessert)
- 12 large egg whites (yep, that’s a lot of eggs, but it’s what makes the cake so light and fluffy – don’t worry, you can use the yolks for making custard)
- 1 teaspoon of cream of tartar (this helps stabilise the egg whites and gives the cake its lovely texture)
- 1 teaspoon of vanilla extract (for a little bit of flavour – because who doesn’t want a dash of vanilla?)
- A pinch of salt (you’d be surprised at how a tiny bit of salt can bring out the sweetness)
- A tube pan (I know, it sounds like something from a science experiment, but it’s a special pan with a hole in the middle that helps the cake cook evenly)
Equipment You’ll Need:
In addition to your ingredients, there are a few things you’ll need to get this cake up and running:
- A mixing bowl (big enough to hold all those egg whites and not make a mess)
- An electric mixer (or a whisk if you’re feeling like a workout; your call)
- A spatula (for folding – no, not the one you use for cooking dinner)
- A cooling rack (so the cake doesn’t turn into a soggy sponge, which no one wants)
- A sifter (for the flour – you can skip this step, but trust me, it helps the cake rise more evenly)
Now, before we get started, let me give you a word of advice: don’t rush this process. Angel Food Cake requires a bit of patience (but nothing too serious), so just take your time. I know you’re probably tempted to skip a step, but trust me, it’s all worth it in the end. Think of it as an exercise in angelic patience.
Step-by-Step Guide to Making Angel Food Cake

Now for the fun part – actually making the cake! Grab your gear, your ingredients, and let’s get started on this heavenly masterpiece.
Step 1: Prepare Your Tube Pan
This is one of the most important parts of the process. You don’t want your cake to stick to the pan (imagine trying to pull a fluffy cloud off a metal surface, not pretty). So, here’s the secret: don’t grease the pan. You heard me right. Most cakes need greasing, but not Angel Food Cake. You want the batter to cling to the sides of the pan as it rises and sets. If you grease the pan, the batter won’t get that lovely rise.
Gently tap your pan to make sure it’s level, and set it aside. We’re going to focus on the fun stuff next.
Step 2: Sift Your Flour and Sugar
Take a sifter or fine mesh sieve and sift the plain flour and caster sugar together into a bowl. Why do we sift, you ask? It’s simple. It helps prevent lumps, ensures even distribution, and just makes everything smoother. It’s like a mini workout for your ingredients.
Once sifted, set it aside. We’ll come back to it later, but it’s always better to be prepared, right? Trust me, this will save you stress down the road.
Step 3: Whisk the Egg Whites
Now, this is where the magic happens. Start by separating your egg whites from the yolks (you don’t need the yolks, but you can save them for another recipe). If you’re feeling fancy, you can crack each egg into a separate bowl to make sure no yolk sneaks into the whites, but if you’re not too bothered, go ahead and just get cracking.
Now, place your egg whites into a large, clean mixing bowl. This is important – make sure the bowl is absolutely spotless. Any grease or fat will prevent the egg whites from reaching their full fluff potential. It’s like trying to make a cloud in a stormy sky – not gonna work.
Add the cream of tartar and a pinch of salt. Then, using an electric mixer, start whipping those egg whites on medium speed. After a few minutes, you should start seeing some bubbles form. Gradually increase the speed and keep going until you get stiff peaks. You’ll know when you’ve reached this point because the egg whites will hold their shape and form a peak when you lift the beaters. If you flip the bowl upside down and nothing falls out, you’re golden.
Step 4: Add the Sugar and Vanilla
Once your egg whites have reached stiff peak status, it’s time to add the sugar. Do this gradually, one tablespoon at a time, mixing gently between each addition. This step can take a bit of time, but don’t rush it. As you add the sugar, your egg whites will start to look glossy and beautiful – like little fluffy clouds, right?
Next, stir in the vanilla extract. This is where your cake gets that subtle, aromatic flavour. Be gentle with your folding here. You don’t want to knock the air out of your egg whites!
Step 5: Folding in the Flour and Sugar Mixture
Now, this is where things get delicate. You’re going to fold in the sifted flour and sugar mixture. You don’t want to stir aggressively, or else you’ll deflate all that gorgeous fluff you worked so hard for. Use a spatula and gently fold the flour mixture into the egg whites in three batches. Fold, don’t stir – we want to keep that airiness intact.
Be sure to scrape the sides and bottom of the bowl as you fold to make sure everything is incorporated.
Step 6: Pour the Batter Into the Pan
Once your batter is beautifully combined, it’s time to pour it into the ungreased tube pan. Do not tap the pan (even though it’s so tempting). Just pour gently and evenly.
Step 7: Bake
Place the pan in a preheated oven at 170°C (150°C fan), or 325°F. Let it bake for about 35 to 40 minutes. You’ll know it’s done when the cake springs back to the touch and a skewer inserted into the centre comes out clean.
But remember, don’t open the oven door too soon – the cake needs time to rise and set. Be patient, you don’t want to disturb it.
Step 8: Cooling
This is probably the hardest part – the waiting. Once the cake is done, don’t just yank it out of the pan. You need to let it cool upside down (this helps prevent it from collapsing). If your pan has feet, that’s great – place it on a bottle to let it cool. If not, just leave it to cool in the pan for about an hour.
Step 9: Release the Cake
Once the cake has cooled, it’s time to release it from its pan. Carefully run a knife around the edges to loosen the cake. Gently lift it out and place it on a cooling rack.

Step 10: Serve and Enjoy
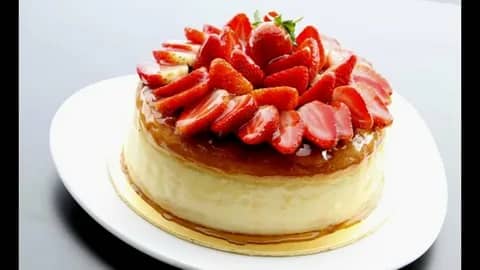
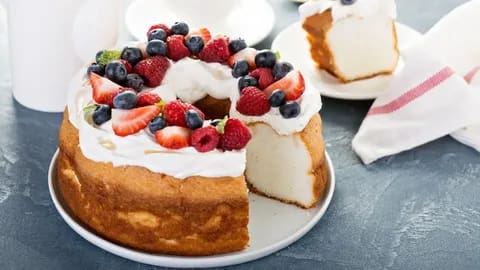
Once your Angel Food Cake is completely cool, it’s ready to serve. You can enjoy it plain, or top it with some whipped cream, berries, or a drizzle of chocolate sauce. Just imagine, you’ve created a cake that’s light, fluffy, and absolutely heavenly. You did that. Well done.
Final Thoughts

Making Angel Food Cake might seem like a task fit for an angel, but with a little bit of patience and a sprinkle of love, you can make it happen. So next time you’re craving something light and airy, skip the store-bought options and try your hand at this beautiful, cloud-like cake. And remember – even though it’s angelic, there’s no reason why you can’t enjoy it like the mortal you are.
