How to Make a Bundt Cake: A Simple and Fun Guide to a Delicious Treat

Bundt cakes, those beautiful ring-shaped desserts that seem to have a bit of a magic charm, are a perfect way to impress your friends, family, or even your cat (they’re great at looking impressed when you bake). But don’t be fooled by their sophisticated appearance—making a Bundt cake is surprisingly simple. All you need is a little patience, the right ingredients, and some good vibes. Trust me, once you’ve mastered this, you’ll be the star baker of your household (even if your dog still prefers the postman).
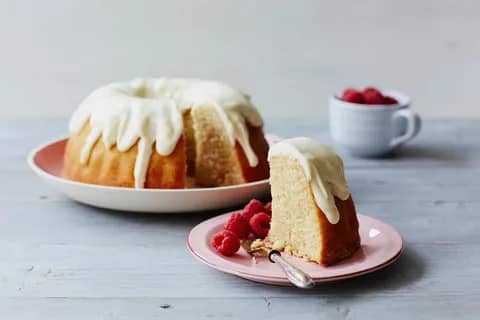
So, without further ado, let’s get our hands a bit floury and learn how to bake a Bundt cake that will make everyone ask, “Where did you learn to bake like this?” (Spoiler alert: it was here).
What is a Bundt Cake?
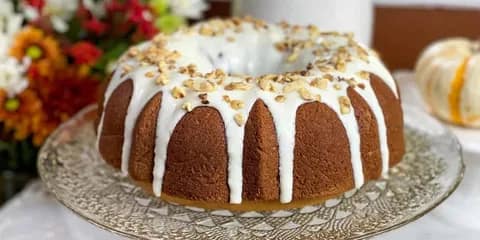
Before we get to the fun stuff, let’s answer the all-important question: What on earth is a Bundt cake? Well, a Bundt cake is simply a cake baked in a special circular pan with a hole in the middle. It’s a bit like a cake and a doughnut had a baby. These cakes are typically dense, moist, and have a beautiful ring shape that gives them an elegant, almost magical look—perfect for birthdays, holidays, or those random afternoons when you feel like being a little fancy.

Ingredients You’ll Need:
For this Bundt cake, we’re going for a classic vanilla cake with a little zing. It’s perfect for beginners and tastes divine, whether you’re serving it to guests or nibbling on it alone while binge-watching your favourite series. Here’s the list of ingredients you’ll need:
- 2 ½ cups of all-purpose flour (plus a little extra for dusting the pan, don’t be shy)
- 1 ½ teaspoons of baking powder
- ½ teaspoon of baking soda (yes, these are different things, don’t confuse them, unless you want your cake to collapse into a sad pancake)
- ½ teaspoon of salt (because life’s too short for bland cakes)
- 1 cup of unsalted butter, softened (so don’t try to be lazy and skip the softening step – trust me, it matters)
- 2 cups of granulated sugar (this is a cake, not a salad)
- 4 large eggs (the fresher, the better, unless you’re trying to make a super-egg-y cake, which I wouldn’t recommend)
- 1 tablespoon of vanilla extract (the real stuff, not that imitation nonsense. We’re baking here, not crafting fake vibes)
- 1 cup of buttermilk (or just make your own by adding a spoon of lemon juice to regular milk, and voilà – instant buttermilk magic)
- A pinch of nutmeg (optional, but it adds a nice warm flavour, kind of like a hug in a cake)
- Butter and flour (for greasing the Bundt pan, unless you want your cake to permanently attach itself to the pan. I’m sure you don’t)
Step 1: Prepare Your Bundt Pan
Okay, this might seem like the easiest step, but trust me, it’s a crucial one. If you skip it, you’ll end up with a cake stuck to your pan like a bad first date. First, grab your Bundt pan. Don’t worry if you don’t have one—any round cake tin with a hole in the middle will do the trick.
Now, generously butter the inside of the pan. No, not just a tiny little bit—cover every nook and cranny. We don’t want any cake-shaped nightmares here. Once buttered, sprinkle a little flour inside, swirling it around to coat the pan. This will ensure that your cake slides out like it’s meant to. If you want to be extra, you could even use baking spray with flour. But if you’re a rebel like me, just use good ol’ butter and flour.
Step 2: Mix the Dry Ingredients
Grab a medium-sized bowl, and let’s get to the dry stuff. Sift 2 ½ cups of flour, 1 ½ teaspoons of baking powder, ½ teaspoon of baking soda, and ½ teaspoon of salt together. I know, I know, sifting feels like a chore, but it helps to avoid those horrible flour lumps that make you look like a novice. Plus, it gives your cake a lighter texture. So, pretend you’re a professional and go ahead and sift away.
Once sifted, set the bowl aside. Go ahead, give it a little high-five for being so organised.
Step 3: Cream the Butter and Sugar
Now it’s time for the fun part. Take your softened 1 cup of butter and 2 cups of sugar, and throw them into a large mixing bowl. Using an electric mixer or a stand mixer (your arms will thank you later), beat them together until the mixture becomes light, fluffy, and a little pale in colour. You want it to look like a soft cloud—yes, a cloud, not a brick. This should take about 4-5 minutes of mixing, so be patient. This is the part that adds air into the cake, so don’t skimp on it!
Step 4: Add the Eggs, One at a Time
Now comes the eggy goodness. Add your 4 large eggs, one at a time, beating well after each addition. You want to make sure the eggs are fully incorporated before adding the next one. Trust me, this step isn’t just about adding eggs to the batter; it’s about building a beautiful cake structure. After the last egg is added, your batter should look rich and smooth, kind of like an expensive body lotion (but tastier).
Step 5: Add the Vanilla Extract
Now, pour in the 1 tablespoon of vanilla extract. This is the secret ingredient that makes your cake smell like heaven and tastes like a dream. Don’t even think about using vanilla essence – go for the real deal. If you have a vanilla bean, even better. Just slice it open and scrape out the seeds for a more natural flavour.
Step 6: Alternate Adding the Dry Ingredients and Buttermilk
Now we’re getting to the good stuff. You’re going to add the dry ingredients and the buttermilk to the butter mixture. But—hold up!—we’re doing this in stages. Start by adding about a third of the dry ingredients, then mix. After that, add half of the 1 cup of buttermilk and mix again. Keep alternating until everything is added in, finishing with the dry ingredients. Mix until just combined, but don’t overdo it, or your cake will become tough, and no one wants that.
Step 7: Pour the Batter into the Pan
Your batter should now look smooth and creamy. Take a moment to admire it, because it’s about to become something glorious. Carefully pour the batter into the prepared Bundt pan. Use a spatula to spread the batter evenly around the pan. Don’t be too rough—this isn’t a wrestling match.
Step 8: Bake the Bundt Cake
Now, it’s time to bake! Preheat your oven to 180°C (350°F) and pop the Bundt pan into the oven. Bake for 45-55 minutes, but don’t just twiddle your thumbs. Check the cake after 45 minutes by inserting a skewer or toothpick into the centre. If it comes out clean (not gooey), then the cake is done. If it still has batter on it, let it bake for a few more minutes and check again.
Step 9: Let the Cake Cool
This is where your patience comes in. Once the cake is done, take it out of the oven and place it on a wire rack to cool. Don’t even think about flipping it out of the pan yet! Give it at least 10-15 minutes to cool down. If you try to flip it out too soon, you’ll risk a cakey disaster. So, grab a cup of tea (or coffee, or wine – I won’t judge) and take a break.
Step 10: Flip and Serve
Once the cake is cool enough to handle, flip the Bundt pan over onto a plate or serving tray. If you’ve greased and floured it properly, the cake should come out smoothly, leaving behind no sticky mess. If it sticks, just give it a gentle nudge with a butter knife and try again.
Now, if you want to be extra, dust the top of your Bundt cake with a little powdered sugar, or drizzle some icing on top. Or, you know, just eat it as-is because it’s already delicious. But hey, a little extra sweetness never hurt anyone.
Tips for a Perfect Bundt Cake:
- Room Temperature Ingredients: Make sure your butter, eggs, and buttermilk are at room temperature before you start baking. This will help them blend together more smoothly.
- Don’t Overmix: Overmixing can lead to a dense and tough cake. Mix until just combined!
- Get Creative with Flavours: While this is a classic vanilla Bundt, you can easily add other flavours like lemon zest, cocoa powder, or even a swirl of caramel sauce for some extra fun.
- Check for Doneness: Oven temperatures can vary, so make sure to check your cake with a toothpick. If it comes out clean, it’s time to take it out.
- Bundt Pan Tips: If you have a fancy Bundt pan with intricate designs, make sure to grease and flour it generously. Those little nooks and crannies can be tricky!

Wrapping It Up
And there you have it, folks! A simple yet delicious Bundt cake that will make you the hero of your kitchen. Whether you serve it with a cup of tea or as the centrepiece of your dessert table, this cake will surely impress. Just remember: Baking is a lot like life—sometimes it’s a little messy, but as long as you’re having fun, the results will always be sweet.
So, get your Bundt pan out, preheat that oven, and start baking. After all, cake is always a good idea, and Bundt cakes are basically the fancy version of “because you deserve it.”
Happy baking!

